Block printing is one of the most beautiful and accessible crafts you can learn. With a hand-carved wooden block, textile ink, and a piece of fabric, you can create something unique in just a few minutes — an object that carries thousands of years of history. And the best part? You don't need to be an artist to get started.
This guide walks you through the process step by step, from choosing your supplies to completing your first finished projects — with all the tips you need to avoid the classic beginner mistakes.
A technique 3,000 years in the making
Block printing was born in India, in the workshops of Rajasthan. The cities of Jaipur, Bagru, and Sanganer remain its world capitals today. Each has its own identity: Bagru is known for natural plant-based dyes (indigo, henna, iron rust), Sanganer for delicate floral motifs on white backgrounds, and Jaipur for the richness and complexity of its multicolour prints.
The technique has been documented in India since at least the 12th century, though it is likely far older. It reached its golden age under the patronage of the Mughal emperors, who were great admirers of printed and embroidered textiles. The craftsmen — known as chippas — passed their knowledge from father to son, jealously guarding their dye recipes and block collections.
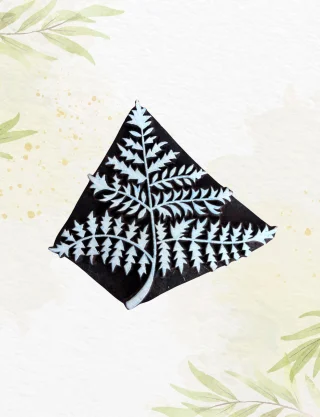
Every block is a work of art in its own right: artisans spend weeks chiselling teak wood to create a single motif, with a precision that is hard to imagine.
Today, block printing is experiencing a worldwide renaissance. As an antidote to mass-produced textiles, more and more people are seeking to create handmade, unique, and meaningful objects. Block printing answers that need perfectly: it is accessible, quick to learn, and its results are always slightly imperfect — which is precisely what makes them authentic and beautiful.
How does block printing work?
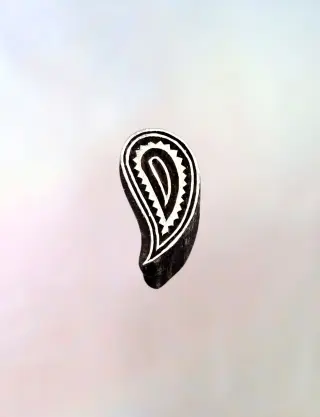
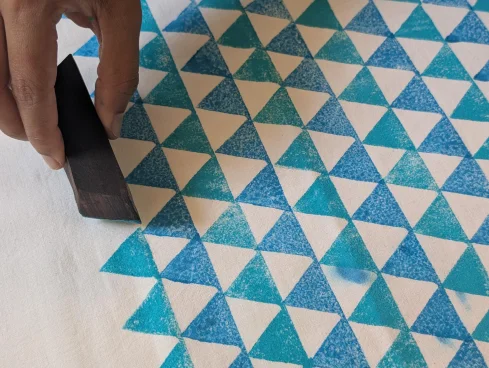
The principle is disarmingly simple. A wooden block (usually teak) is hand-carved by a specialist artisan. Each block carries a unique motif: flower, leaf, geometry, paisley, animal... The block is dipped in textile ink, then pressed firmly onto the fabric. Lift, reposition, repeat.
For multicolour designs, each colour requires a separate block and a separate pass. The artisan must align each impression precisely so the colours lock together correctly — a real skill that takes years to master. For beginners, working with a single colour at a time is more than enough.
- Small blocks (3 to 5 cm): ideal for borders, tight repeating patterns, or decorating small surfaces. Perfect for beginners because they require less pressure and less ink.
- Medium blocks (6 to 9 cm): the most versatile size. They allow you to create balanced compositions on tote bags, tea towels, and napkins. Recommended for your first projects.
- Large blocks (10 cm and above): for ambitious projects — cushion covers, large bags, furnishing fabrics. They require more control, as you need to apply even pressure across the entire surface.
What you need to get started
One of the great advantages of block printing is that it requires very little equipment. You probably already have most of it at home.
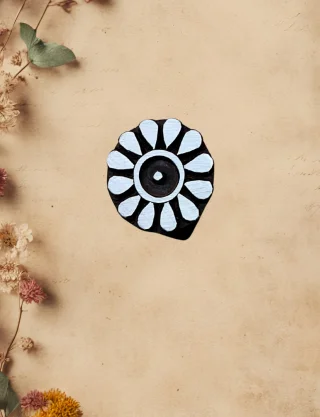
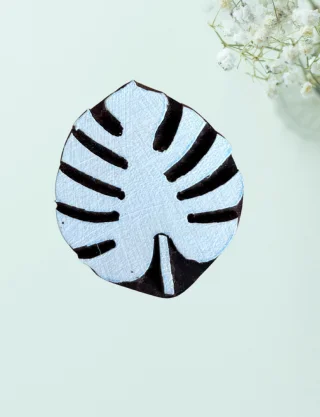
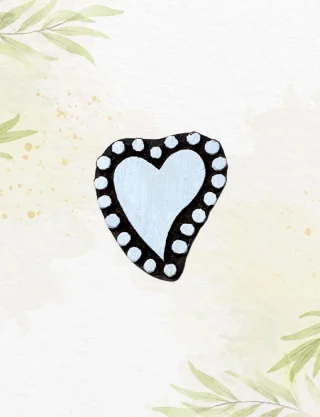
- A carved wooden block: the centrepiece. Choose a motif that speaks to you — a simple flower, a leaf, a heart, a geometric pattern. For beginners, a motif with less fine detail is easier to ink evenly.
- Textile ink (fabric paint): choose an ink designed specifically for fabric — washable and heat-fixable. Water-based inks are the easiest to use and clean up.
- Cotton fabric: cotton is the ideal surface for beginners — it absorbs ink well, stays stable under pressure, and holds up well in the wash. Plain cotton tote bags, tea towels, napkins, and basic t-shirts are all great choices.
- A padded surface: a bath towel folded into several layers on a table works perfectly. This soft surface allows the block to press evenly against the fabric fibres.
- An inking pad: a thin piece of foam or a flat ink pad allows you to coat the block evenly. Pour ink onto the foam and tap the block on it before each print.
- Scrap paper: essential for testing your pressure and ink coverage before moving to the fabric. Never skip this step.
Your first project, step by step
For your first project, we recommend a plain cotton tea towel or a natural canvas tote bag. These surfaces are forgiving of imperfections and genuinely useful in everyday life — perfect for keeping or giving as a gift.
Step 1 — Prepare your fabric. Wash and dry your fabric before printing. This removes any finishing agents that might prevent the ink from bonding properly. Iron it flat so you have an even surface to work on.
Step 2 — Plan your layout. Before you touch the ink, lay your fabric flat and think about the arrangement of your motifs. You can use tailor's chalk to lightly mark a grid. Two main approaches: a regular grid (motifs aligned in rows, like a printed fabric) or a scattered layout (motifs placed randomly, for a more lively, artisanal feel).
Step 3 — Prepare your inking pad. Pour a small amount of textile ink onto your foam pad. Tap the block onto the pad until the entire carved surface is coated with a thin, even layer. Test on scrap paper: the print should be clean, with no white gaps and no ink bleeding around the edges.
The single most important tip: less ink is always better than more. A slightly light print looks charming; an ink blob that bleeds is very hard to fix.
Step 4 — Print. Place the block on the fabric, then press firmly and evenly with both hands for two to three seconds. Do not press from one side only and do not rock the block — that is what causes blurring. Lift the block cleanly and vertically, without sliding.
Step 5 — Repeat. Re-ink the block after each impression (or every two impressions for small motifs). Keep a consistent rhythm: the more regular your technique, the more cohesive the result. The slight variations between one print and the next? That is precisely what proves it is handmade.
Step 6 — Leave to dry for 24 hours. Do not touch the fabric for at least 24 hours. The textile ink needs to dry completely before heat-setting.
Step 7 — Heat-set. Place a pressing cloth over your print and iron on a hot setting (no steam) for 2 to 3 minutes. This step is essential for making the ink washable. Some inks require a tumble dryer pass — always read the manufacturer's instructions.
Step 8 — Wash inside out. For the first few washes, turn the fabric inside out and use a gentle 30°C cycle. Your creation will last for years.
Common mistakes and how to avoid them
Everyone makes the same mistakes at the start. Here are the most frequent ones and how to fix them:
- Too much ink on the block: the fine details fill in and the print becomes a flat blob with no definition. Fix: wipe the block lightly on scrap paper before printing, or reduce the amount of ink on the pad.
- Too little ink: the print appears pale with white gaps. Fix: reload the pad and tap the block more generously. Always test on scrap paper before going back to the fabric.
- The block slips or pivots: the print is blurred or doubled. Fix: hold the block with both hands, apply perfectly vertical pressure, and lift in a single clean movement without sliding.
- The fabric shifts during printing: motifs end up misaligned from row to row. Fix: secure the fabric to your padded surface with clips or repositionable tape before you start.
Project ideas for every level
The real joy of block printing is the variety of things you can create. Here are some ideas depending on your level and mood:
- Beginner level: wrapping paper, greeting cards, fabric gift bags. These projects require no heat-setting (for paper) and are very quick to make.
- Intermediate level: tote bag, tea towel, napkins, table linen. Genuinely appreciated handmade gifts that are also quick to produce in small batches.
- Advanced level: cushion cover, table runner, lightweight curtain, printed t-shirt, fabric yardage for sewing. At this stage, evenness and alignment become real challenges that make all the difference.
Discover Table Indienne's blocks and workshops
At Table Indienne, we offer a selection of hand-carved wooden blocks from Rajasthan, imported directly from traditional workshops. Each block is unique, cut from solid teak by artisans who carry on a craft passed down through generations.
Our range covers every need: small floral motifs for borders, botanical leaves for naturalistic compositions, geometric patterns for a more contemporary look, and of course the paisley — that iconic Indian motif that the whole world recognises and loves.
Want to learn in the best possible conditions? We regularly run block printing workshops in Wittisheim, Alsace. You leave with your own creations, the technique firmly in your hands, and the desire to keep going at home.
Whether you want to start on your own at home or learn the technique in a workshop with other enthusiasts, block printing is a practice that settles into your life and never really leaves. There is something deeply satisfying about placing a block, pressing, lifting — and discovering each time a print that is ever so slightly different from the one before.
That is block printing: the art of the imperfect made beautiful.